
Orpheus writes an interpreter
Orpheus has her smock and beret on today. She's ready to do some painting. She sits down at the computer. The smock is slightly awkward. The beret's about to fall off. I mean, this is probably because the smock and the beret are for humans and not dinosaurs, but I digress.

(Ok. Maybe the beret fits her nicely. I'm just saying the smock is a bit tiny though.)
But today's an exciting day! Because today, we'll get the interpreter up and running, and we'll be able to run programs for real now. And Orpheus will finally be able to get this easel to work.
How the interpreter's going to work
The interpreter's going to be a little different from the lexer and parser, but not too different! It's going to take the nodes that the parser created and make actual things happen. The best part is that it's surprisingly easy - we've done all the hard work in the parser and now we can glide on by, although it'll be a longer-winded.
Orpheus opens up her computer. It's time to start writing the interpreter in interpreter.js:
import Ast from './ast.js'
import { EaselError } from './stdlib.js'

export class Interpreter {
  error(msg) {
    throw new EaselError(`Runtime error: ${msg}`)
  }

  run(ast, scope) {}
}
Just a little boilerplate here. Our main entry point is going to run(), which takes in the abstract syntax tree our lovely parser has created and something new: scope.
So how does this scope thing work?
Scope is what's going to make magic. I mean, turn what we currently have into an actual programming language, by adding a place for us to store the current state of our program. Like an actual programming language - in fact, one of the biggest criteria for a language to be Turing-complete is that it should be able to keep track of state. That's what scope is for - it'll keep track of what variables exist, what functions exist, what structs exist, and any other info we'll have. It's also where we'll inject our standard library into, as we'll see later.
We're going to use a simple key-value store to store our scope, especially since JavaScript is so lenient. While we're at it, let's add a quick utility function to check if a value exists in our scope that'll come in handy later:
export class Interpreter {
  // ...

  inScope(scope, name) {
    return Object.keys(scope).includes(name)
  }
}
Let's get this working
Ok, awesome. How exactly should we go about doing this? Well, it's quite simple really - we're going to loop over every node and run whatever's inside that node. We can take advantage of the fact that we have different kinds of nodes and do different things based on what the node needs. For example, say we have a while statement:
{
    "type": "While",
    "condition": {
      "type": "Binary",
      "left": { "type": "Var", "name": "countdown" },
      "operator": ">",
      "right": { "type": "Literal", "value": 0 }
    },
    "body": [
      {
        "type": "Call",
        "caller": { "type": "Var", "name": "ink" },
        "args": [{ "type": "Var", "name": "countdown" }]
      },
      {
        "type": "Var",
        "name": "countdown",
        "value": {
          "type": "Binary",
          "left": { "type": "Var", "name": "countdown" },
          "operator": "-",
          "right": { "type": "Literal", "value": 1 }
        }
      }
    ]
  }
Every while loop node has a condition and a body. So when we encounter a while loop node, we know we'll need to run while(condition) { run(body) }. condition is a node of its own, and body also happens to be an array of nodes, so we'll need to process those too.
When we were writing our lexer, we differentiated between different token types. When we were writing our parser, we differentiated between different node types. Now, we'll differentiate between values that need to be stored in memory and values that are just literals or references to values in memory. This turns into two main methods:
evaluate(value, scope) {}

execute(node, scope) {}
execute() will call evaluate() for evaluating basic expressions, but execute() will be doing the actual adding of values to our scope. It's similar to the recursive descent we applied while writing our parser, except now we've condensed it down to three methods - run() for blocks of statements, execute() for those statements, and evaluate() for expressions.
Let's fill out execute() with a skeleton to get us started:
execute(node, scope) {
  switch(node.constructor) {
    case Ast.Var:
    case Ast.Set:
    case Ast.Struct:
    case Ast.Func:
    case Ast.Return:
    case Ast.While:
    case Ast.For:
    case Ast.Conditional:
    default:
      this.evaluate(node, scope)
  }
  return scope
}
node.constructor returns the class that the node is a child of, effectively letting us check what class it belongs to.
Do you notice something? Compare this to Parser.stmt(), and you'll notice that they basically match up! This makes sense since statements make changes to state.
Let's fill these out one by one. Ast.Var:
type = "Var"
name is Identifier
value is Expression
case Ast.Var: {
  scope[node.name] = this.evaluate(node.value, scope)
  return scope
}
This is pretty self-explanatory. We evaluate the value of the variable (e.g., we evaluate something like 40 + 2) and add it to our scope. But it looks like...
Quick detour to evaluate
We haven't filled out evaluate() yet! So let's take a quick detour to fill it out. It looks super similar, except we won't really be tweaking what's in scope here:
evaluate(value, scope) {
  switch (value.constructor) {
    case Ast.Var: {
        if (!this.inScope(scope, value.name))
          this.error(`${value.name} is not defined in current scope`)
        return scope[value.name]
    }
    case Ast.Unary: {
      const operations = { '!': apply => !apply }
      return operations[value.operator](this.evaluate(value.apply, scope))
    }
    case Ast.Binary: {
      const operations = {
        '<': (left, right) => left < right,
        '<=': (left, right) => left <= right,
        '>': (left, right) => left > right,
        '>=': (left, right) => left >= right,
        '!=': (left, right) => left != right,
        '==': (left, right) => left == right,
        '&&': (left, right) => left && right,
        '||': (left, right) => left || right,
        '+': (left, right) => left + right,
        '-': (left, right) => left - right,
        '*': (left, right) => left * right,
        '/': (left, right) => left / right
      }
      return operations[value.operator](
        this.evaluate(value.left, scope),
        this.evaluate(value.right, scope)
      )
    }
    case Ast.Literal: {
      return value.value
    }
    case Ast.Array: {
      return value.value.map(expr => this.evaluate(expr, scope))
    }
    default: {
      this.error("Expected expression but got statement")
    }
  }
}
I started out with the most obvious ones here. If we get a reference to a variable, we'll search scope and return a value if it's there. If it's a unary or a binary operator, we apply the operator to the appropriate expression(s). Literals and arrays are also pretty simple, we literally just return the value (or map over the values, in the case of arrays.)
Notice how it's recursive! Some of these also call evaluate() to further evaluate an expression until we get to the simplest possible value - either a reference to another value or the value itself (i.e., a literal).
Back up the rabbit hole
Ok, let's move back up the rabbit hole now and keep working our way through execute:
Ast.Struct:
type = "Struct"
name is Identifier
members is Identifier[]
case Ast.Struct: {
  scope[node.name] = members => {
    // Make sure there are no invalid keys
    let instance = {}
    for (let key of Object.keys(members)) {
      if (!node.members.includes(key))
        this.error(`Unexpected member ${key} found while creating instance of ${node.name}`)
      instance[key] = members[key]
    }
    return instance
  }
  return scope
}
This is run when we create a struct definition, like brush Cell has { x, y, live }. Notice how it's a function. Think of it like running a predefined function, a constructor of sorts - when we create a struct using prep Cell(x: x, y: y, live: live), we're running a function that'll return an object that contains those keys, e.g. { x: 1, y: 1, live: false }.
Where does the code for creating a struct go then? Since it evaluates to an expression ({ x: 1, y: 1, live: false }), we'll tackle an extra case in evaluate():
case Ast.Instance: {
  if (!this.inScope(scope, value.name))
    this.error(`${value.name} is not defined in current scope`)

  const constructor = scope[value.name]
  let members = {}
  for (let [member, memberValue] of Object.entries(value.members))
    members[member] = this.evaluate(memberValue, scope)
  return constructor(members)
}
That's where the constructor comes into play! And notice that when we create a struct, we pass in a list of expressions rather than a list of identifiers, as opposed to what we did when we created the original constructor.
Ast.Func:
type = "Func"
name is Identifier
params is Identifier[]
body is Statement[]
case Ast.Func: {
  const func = args => {
    let localScope = { ...scope }
    for (let [i, param] of node.params.entries())
      localScope[param] = args[i]
    try {
      this.run(node.body, localScope)
    } catch (err) {
      if (err instanceof ReturnException) return err.value
      else throw err
    }
  }

  scope[node.name] = func
  return scope
}
What we're doing here is pretty ingenious. (Or really, this whole thing has been quite ingenious. Seriously, pat yourself on the back for coming this far along!). We have a wrapper function - it'll take a list of arguments. We create a copy of the scope - here's where local scope comes into play! - and update the local scope with the arguments, and then use run. The reason why we use run instead of, say execute, is that a function is a block of statements, which is what run accounts for.
The extra special thing here is that we've wrapped our call to run with a try-catch block, but we specifically check if we get a ReturnException, and it turns out:
Ast.Return:
type = "Return"
value is Expression
case Ast.Return:
  throw new ReturnException(this.evaluate(node.value, scope))
ReturnException doesn't exist yet, so let's make it happen, at the top of interpreter.js. And hopefully, now the pieces are clicking into place - throwing an exception is a really useful way of exiting running a block of code, it turns out.
export class ReturnException extends Error {
  constructor(value) {
    super()
    this.value = value
  }
}
Now that we have functions that can return shtuff, we need to be able to actually call functions. This is a job for evaluate, since ultimately we'll use a function we find in our scope to return a value.
case Ast.Call: {
  const caller = this.evaluate(value.caller, scope)
  if (!caller) this.error('Caller did not resolve to a defined value')
  let args = []
  for (let arg of value.args) args.push(this.evaluate(arg, scope))
  return caller(args)
}
Pretty simple, right?
Ast.While:
type = "While"
condition is Expression
body is Statement[]
case Ast.While: {
  while (this.execute(node.condition, scope)) this.run(node.body, scope)
  break
}
We've finally reached our first example! This one you probably understand now :)
Ast.For:
type = "For"
id is Identifier
range is Expression[]
body is Statement[]
case Ast.For: {
  let localScope = { ...scope, [node.id]: this.evaluate(node.range[0]) }
  while (localScope[node.id] < this.evaluate(node.range[1], scope)) {
    this.run(node.body, localScope)
    localScope[node.id]++
  }
  break
}
For loops are really just variations on while loops. Here, we set up a local scope and inject the variable we'll use to keep track of what iteration we're on, and of course, we make to update it every iteration.
Ast.Conditional:
type = "Conditional"
condition is Expression
body is Statement[]
otherwise is Ast.Conditional[]
case Ast.Conditional: {
  if (this.evaluate(node.condition, scope)) this.run(node.body, scope)
  else
    for (const conditional of node.otherwise)
      this.execute(conditional, scope)
  break
}
This is pretty expected. We evaluate the condition, and if it's true, we run the if-statement's body. Otherwise, we loop through the other conditions left and do the same exact thing by recursively calling execute(). The useful thing is that if there is an else statement in there, we've set its condition to always be true so it'll always run if the other conditions don't match up.
Hey, I think we forgot one last node in execute()! Let's add it now:
Ast.Set:
type = "Set"
name is Identifier
property is Identifer
value is Expression
case Ast.Set: {
  if (!this.inScope(scope, node.caller))
    this.error(`${node.caller} is not defined in current scope`)
  scope[node.caller][node.property] = this.evaluate(node.value, scope)
  return scope
}
Of course, with a setter, one has to have a getter. That sounds like a duty for evaluate, of course, since we're getting a value:
name = "Get"
caller is Identifier
property is Identifier
isExpr is boolean
case Ast.Get:
  const caller = this.evaluate(value.caller, scope)

  let get
  if (value.isExpr) get = caller[this.evaluate(value.property, scope)]
  else get = caller[value.property]

  if (get instanceof Function) return get.bind(caller)
  return get
We're finally going to make use of that extra isExpr property we've attached to our getter nodes!
But also, notice the last part of this - we have a special case for properties that actually happen to be functions - we make sure to bind the function to the caller. What does this mean exactly? Well, let me give you a quick example in JavaScript. Run node in a terminal somewhere:
let test = [1, 2, 3]
let push = test.push // References the push method on test
push(4)

// > Uncaught TypeError: Cannot convert undefined or null to object at push (<anonymous>)
This doesn't work because the push method is no longer "attached" to the original array, the caller. We don't want to run into this kind of problem, so we've just made sure to bind methods with their caller.
And that wraps up our interpreter! We've tackled every type of node our AST could possibly generate, so we're done. Let's finish run() and we'll be done:
run(ast, scope) {
  for (const node of ast) scope = this.execute(node, scope)
  return scope
}
The standard library
This is great and dandy, but there's one thing we can't really do, and that is: print something to the console! What's the point of our programming language if we can't write "Hello, world!" in it and view what our values are? Not much, honestly. Let's fix that now with a standard library in stdlib.js:
export default {
  ink: args => console.log(...args),
  random: ([min, max]) => {
    if (min >= 0 && max <= 1) return Math.random()
    return Math.random() * (max - min + 1) + min
  },
  round: number => Math.round(number)
}
Let's try it out now. First, including the interpreter in easel.js:
import { Interpreter } from './interpreter.js'
import stdlib, { EaselError } from './stdlib.js'

// ...

if (location) {
  const program = await readFile(location)

  const lexer = new Lexer(program)
  try {
    lexer.scanTokens()
  } catch (err) {
    console.log(err)
    process.exit(1)
  } finally {
    if (debug) await writeFile('tokens.json', JSON.stringify(lexer.tokens, null, 2))
  }

  const parser = new Parser(lexer.tokens)
  try {
    parser.parse()
  } catch (err) {
    console.log(err)
  } finally {
    if (debug) await writeFile('ast.json', JSON.stringify(parser.ast, null, 2))
  }

  const interpreter = new Interpreter()
  try {
    interpreter.run(parser.ast, stdlib)
  } catch (err) {
    console.log(err)
  }
}
Place this in test.easel and run node easel.js test.easel --dbg!
ink("Hello, world!")
ink(round(random(0, 100)))

---

Hello, world!
42
Oh smokes. Our programming language is working! 🎉 🎉 🎉

Can we run that program that was at the beginning of this journey? Let's add a few more features to our standard library first and try again:
// ...

export class Canvas {
  constructor(rows = 64, cols = 64) {
    this.default = { r: 0, g: 0, b: 0 }
    this.rows = rows
    this.cols = cols
    this.grid = []
    for (let i = 0; i < cols * rows; i++) this.grid.push(this.default)
  }

  get([x, y]) {
    return this.grid[y * this.cols + x]
  }

  fill([x, y, color]) {
    let cell = this.grid[y * this.cols + x]
    if (!cell)
      throw new Error(
        `Cell at (${x}, ${y}) out of range for ${this.rows}x${this.cols} canvas`
      )
    cell.r = color.r
    cell.g = color.g
    cell.b = color.b
  }

  erase([x, y]) {
    let cell = this.grid[y * this.cols + x]
    if (!cell)
      throw new Error(
        `Cell at (${x}, ${y}) out of range for ${this.rows}x${this.cols} canvas`
      )
    cell = { ...this.default }
  }
}

export default {
  Canvas: new Canvas(),
  Color: members => {
    let instance = {}
    for (let key of Object.keys(members)) {
      if (!['r', 'g', 'b'].includes(key))
        throw new Error(`Unexpected member ${key} when creating color`)
      instance[key] = members[key]
    }
    return instance
  }
  // ...
}
One last thing: arrays in Easel have two special methods called add and get that'll, well, add and get an item from itself, respectively. Let's add some prototype methods to take care of that at the top of interpreter.js:
Array.prototype.add = function (args) {
  this.push(...args)
}

Array.prototype.get = function ([index]) {
  return this[index]
}
Go ahead and run node easel.js program.easel --dbg.
prepare rows as 64
prepare cols as 64

brush Cell has { x, y, live }

~ Exercise: try setting a custom pattern instead of randomness!
sketch seed {
  prepare cells as []
  loop x through (0, rows) {
    loop y through (0, cols) {
      prepare live as false
      prepare chance as random(0, 100)
      if (chance < 10) {
        prepare live as true
      }
      cells.add(prep Cell(x: x, y: y, live: live))
    }
  }
  finished cells
}

prepare cells as seed()

sketch getNeighbors needs (cells, index) {
  ~ Get neighbors around a cell
  prepare neighbors as []

  ~ Populate neighbors
  if (index - rows - 1 > 0) {
    neighbors.add(cells[index - rows - 1])
  }
  if (index - rows > 0) {
    neighbors.add(cells[index - rows])
  }
  if (index - rows + 1 > 0) {
    neighbors.add(cells[index - rows + 1])
  }
  if (index > 0) {
    neighbors.add(cells[index - 1])
  }
  if (index < cells.length - 1) {
    neighbors.add(cells[index + 1])
  }
  if (index + rows - 1 < cells.length - 1) {
    neighbors.add(cells[index + rows - 1])
  }
  if (index + rows < cells.length - 1) {
    neighbors.add(cells[index + rows])
  }
  if (index + rows + 1 < cells.length - 1) {
    neighbors.add(cells[index + rows + 1])
  }

  prepare alive as []
  loop i through (0, neighbors.length) {
    if (neighbors[i].live) {
      alive.add(neighbors[i])
    }
  }
  finished alive
}

sketch painting {
  ~ This loop runs every iteration and must be in every program
  loop i through (0, cells.length) {
    prepare cell as cells[i]
    prepare neighbors as getNeighbors(cells, i)
    if (cell.live) {
      if (neighbors.length < 2 || neighbors.length > 3) {
        ~ Any live cell with fewer than two neighbors dies, as if by underpopulation
        ~ Any live cell with more than three live neighbors dies, as if by overpopulation
        prepare cell.live as false
      } elif (!cell.live && neighbors.length == 3) {
        ~ Any dead cell with exactly three live neighbors becomes a live cell, as if by reproduction
        prepare cell.live as true
      }
    } else {
      if (neighbors.length == 3) {
        ~ Any dead cell with exactly three live neighbors becomes a live cell, as if by reproduction
        prepare cell.live as true
      }
    }

    if (cell.live) {
      ~ Now draw the cell if it's alive!
      prepare color as prep Color(r: 255, g: 0, b: 0)
      Canvas.fill(cell.x, cell.y, color)
    } else {
      ~ If it's dead, turn the cell off
      Canvas.erase(cell.x, cell.y)
    }
  }
}

painting()

---

~ ...

{ r: 0, g: 255, b: 0}
{ r: 0, g: 0, b: 0 }
{ r: 0, g: 255, b: 0 }
{ r: 0, g: 255, b: 0 }
{ r: 0, g: 255, b: 0 }

~ ...
Congrats. You, you just wrote a programming language. That was pretty magical, wasn't it?

What about... interactivity?
If you're running the web editor, this part won't work quite yet, unfortunately. :(
What happened to interactivity? What if we don't want to run a program from a file? Let's add a REPL (read, evaluate, print, loop) now.
It's actually quite easy to do, and we have left a placeholder for it, if you remember in part one!
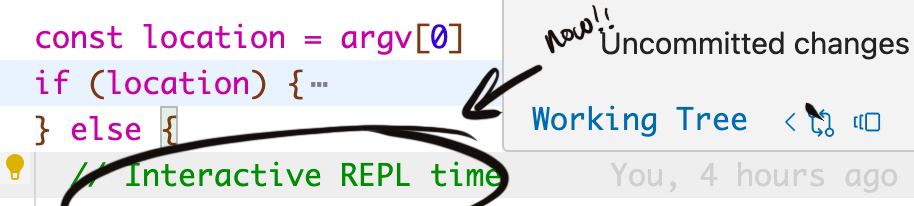
Let's head on over and fill that sad and empty else-statement now. The obvious first step: let's set up the interpreter and the scope.
//  ...
if (location) {
  // ...
} else {
  // Interactive REPL
  const interpreter = new Interpreter()
  let scope = {
    ...stdlib,
    exit: () => process.exit(0)
  }
}
I've added an extra exit() function so we can exit from the REPL.
Let's read a line from the terminal now. We'll need node:readline:
import readline from 'node:readline'
And back in the else statement:
const input = readline.createInterface({
  input: process.stdin,
  output: process.stdout
})

// Remember to close stream before exiting
process.on('SIGINT', () => {
  input.close()
})

const repl = line => {
  console.log(line)
  input.question('> ', repl)
}

input.question('> ', repl)
There's the infinite loop we need. Now, instead of reading a file, we're going to read the line:
const repl = line => {
  let hadError = false

  const lexer = new Lexer(line)
  try {
    lexer.scanTokens()
  } catch (err) {
    if (err instanceof EaselError) {
      hadError = true
      console.log(err.toString())
    } else throw err
  }

  if (!hadError) {
    const parser = new Parser(lexer.tokens)
    try {
      parser.parse()
    } catch (err) {
      if (err instanceof EaselError) console.log(err.toString())
      else throw err
    }

    try {
      scope = interpreter.run(parser.ast, scope)
    } catch (err) {
      if (err instanceof EaselError) console.log(err.toString())
      else throw err
    }
  }
}
The only difference here, frankly, is that we introduce hadError. The logic is that if our lexer runs into an error, we don't want to keep going. For the parser it's a little bit different - when we run into an error, we can technically keep going because we're always guaranteed to have a valid AST (or an empty one).
And that's really all! Now you can fire up a terminal, run node easel.js, and boom! you have an interpreter that reads line by line.
What about multiple lines? Well, the logic behind multiple lines is that we'll check if the end of our first line has a token that allows us to keep going. Basically, then: left brackets, left braces, and left parentheses. Then we'll keep reading and keeping track of the given operator until we reach the matching closing one.
The complete code here is at interpreter.js.